The year of our lord 2025 has really been a doozy. I’ve been feeling like…
Back and Shoulder Flexibility

Flexibility has always been a struggle for me. When I first began training in pole, I was all about power and strength moves. I have always enjoyed lifting weights, and after years of doing that and only sporadically stretching, I was rather stiff. In particular, my shoulders and hip flexors had become very tight. After becoming a performer, I realized that while strength tricks such as planches are appreciated by competition judges, members of my audiences were wowed more by flexibility tricks. Even something as simple as a bridge or split on the floor gets them excited. Thus began my long journey to become flexible.
I began training with a general circus coach and eventually with a contortionist. I’ve learned that gaining flexibility is as difficult as gaining strength. I currently have a 30-60 minute daily stretch session where I go through all three splits (don’t forget your middle splits!) five times and lots of back and shoulder stretching. Once or twice per week I do a longer session to really push my flexibility to new levels. It’s been so rewarding to now sometimes be the most flexible person in the room or have other students/acrobats comment on my flexibility!
I’d like to share some of my back and shoulder stretches. To get into really back-bendy poses, you need to not only have a flexy back, but also flexible hips and shoulders, which are often forgotten.
I like to start warming up for back-bendy tricks by foam-rolling my entire back and hip flexors. Foam-rolling can help break down scar tissue (which we all have) as well as simply helping your muscles relax. I recommend foam-rolling any muscle you intend to stretch. It’s also a good idea to make sure you are nice and warm. You can wear lots of layers (back warmers are great too) and even blast a space heater on your back.
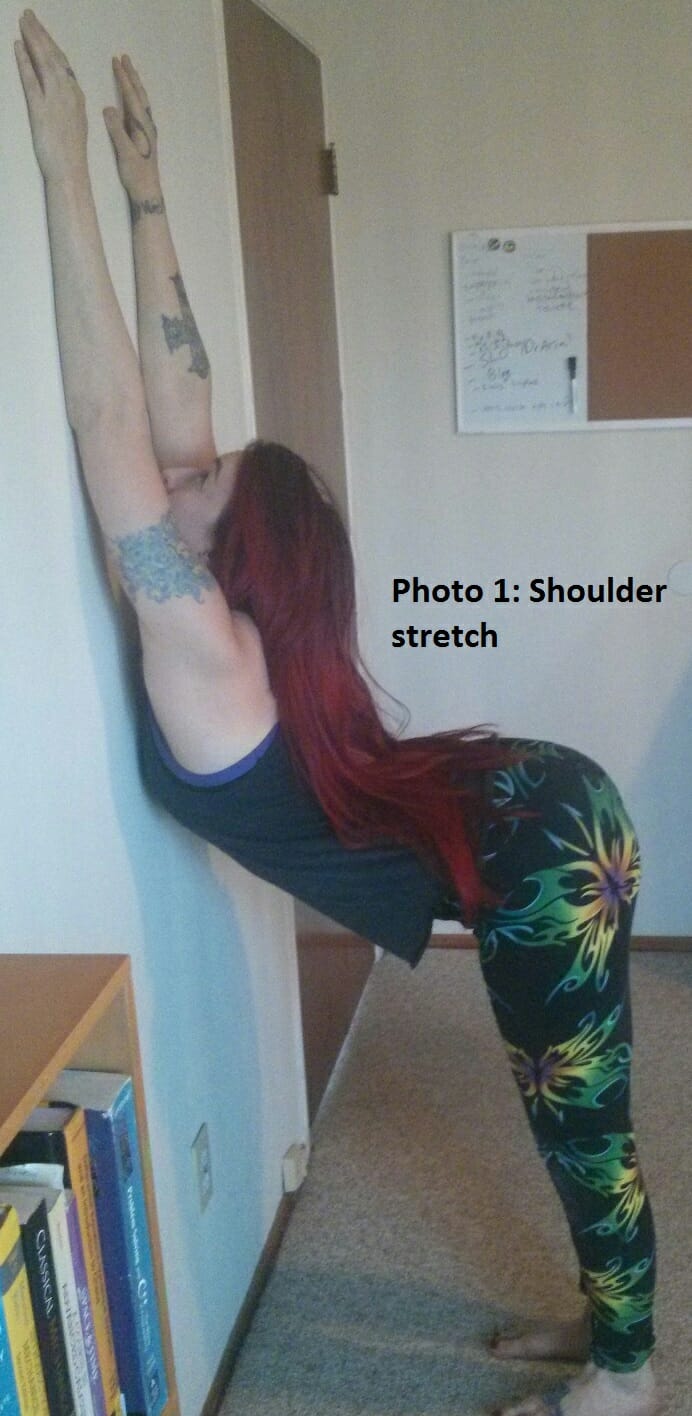
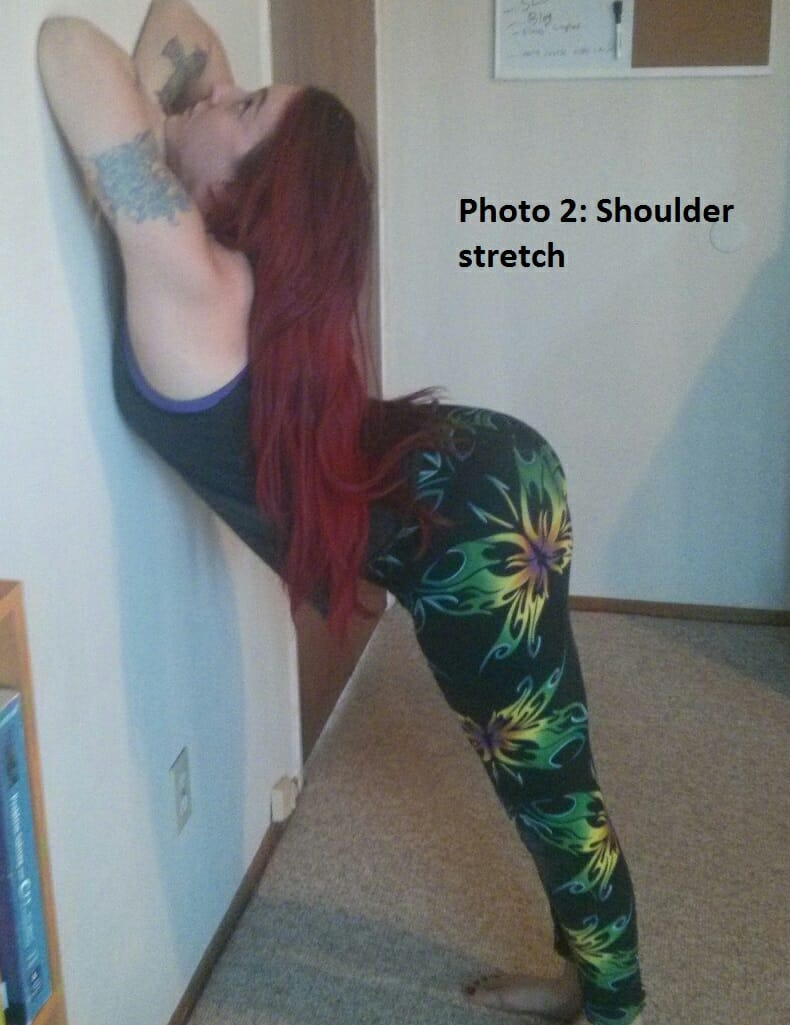
Next, I start with some gentle stretches. At this point, you shouldn’t feel like you’re pushing yourself at all. I do a couple basic hip flexor stretches (here’s a good tutorial: https://www.youtube.com/watch?v=YQmpO9VT2X4), a shoulder stretch on the wall (See Photo 1 & 2), and a few cobras. In your cobra, start on your elbows to focus just on your middle back. Then engage your core (hollow-out), and slowly straighten your arms as your relax into your lower back (release your core). Many people will tense up their glutes, so make sure you aren’t doing that. To make this exercise more intense, you can start with your knees on a mat and then do your cobras.
After that, I start doing some bridges. The first one should be very gentle, and wiggle around a bit in it. Then I do at least several more bridges, alternating between back bridge (Photo 3 – knees bent) and shoulder bridge (Photo 4 – knees straight). Even if you can’t straighten your legs yet, it’s important to push into your shoulders a little bit with your knees. Make sure to open your shoulders while you push with your knees or straighten your legs. Ideally, you want to be able to bridge with your hands stacked just beneath your shoulders.
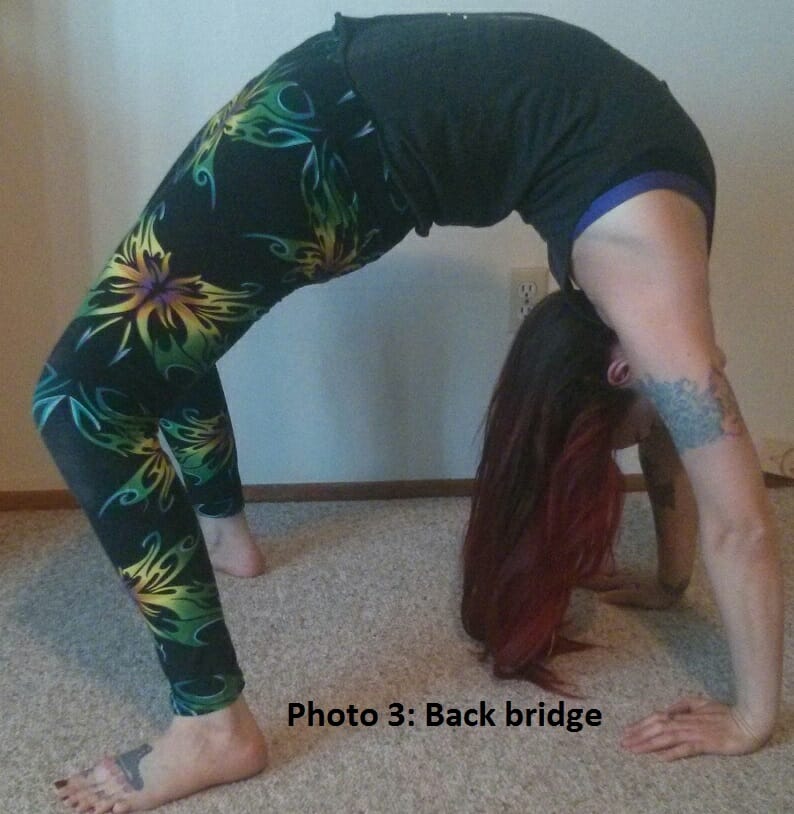
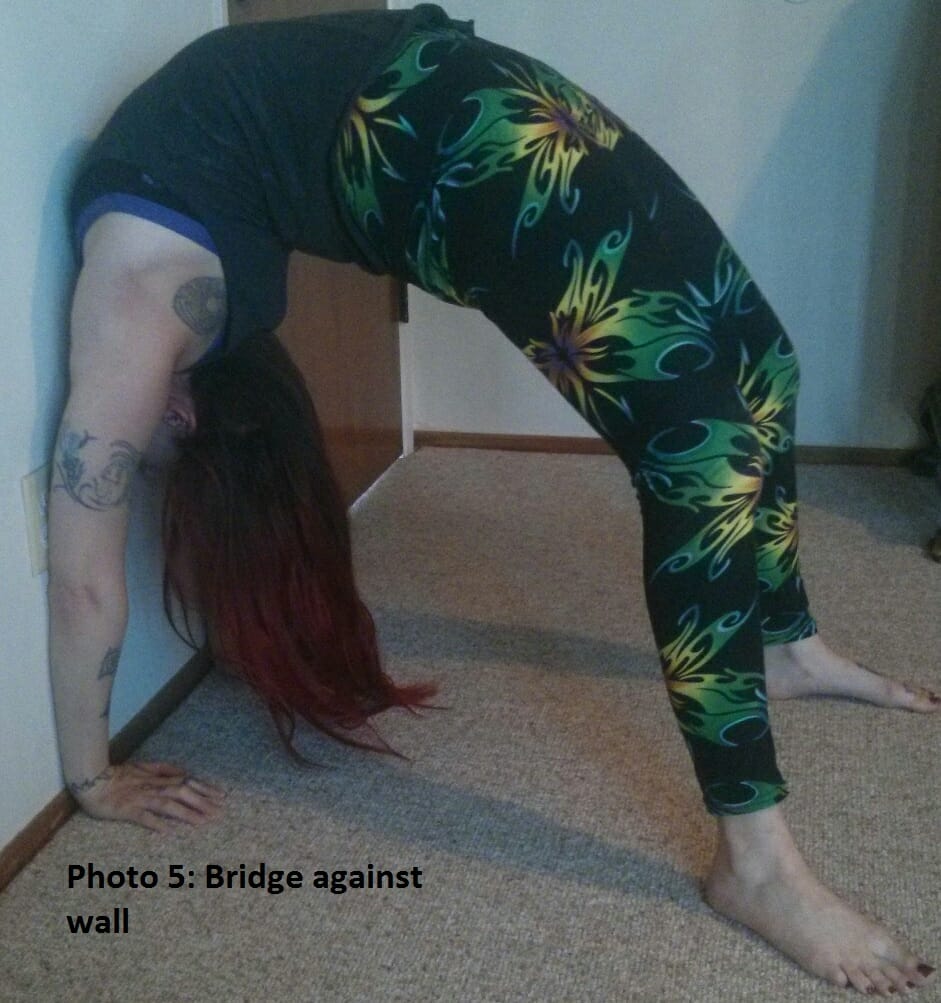
Also make sure to keep your fingers wide, arms straight, and head arching towards your behind. When you’re ready, you can work on harder back bending tricks, such as walking in your bridge or twisting side to side by walking your hands to one foot and then the other. Another great shoulder exercise is to bridge with your chest on the wall (Photo 5).

I find that doing several back-bends from standing is very helpful. If you’ve never done this before, make sure you have a friend spot you by bear-hugging your waist. Many people don’t think they’re flexible enough for this, but it’s really about form more than flexibility. Make sure to keep your arms next to your ears (this is what keeps your head from crashing into the floor!) and relax your shoulders. Then, think of rolling your head down your spine as you bend from the top of your back all the way down. The last thing to happen is to bend your legs if you need to. Then stand back up by just reversing the process (keep your arms next to ears until you are all the way up).
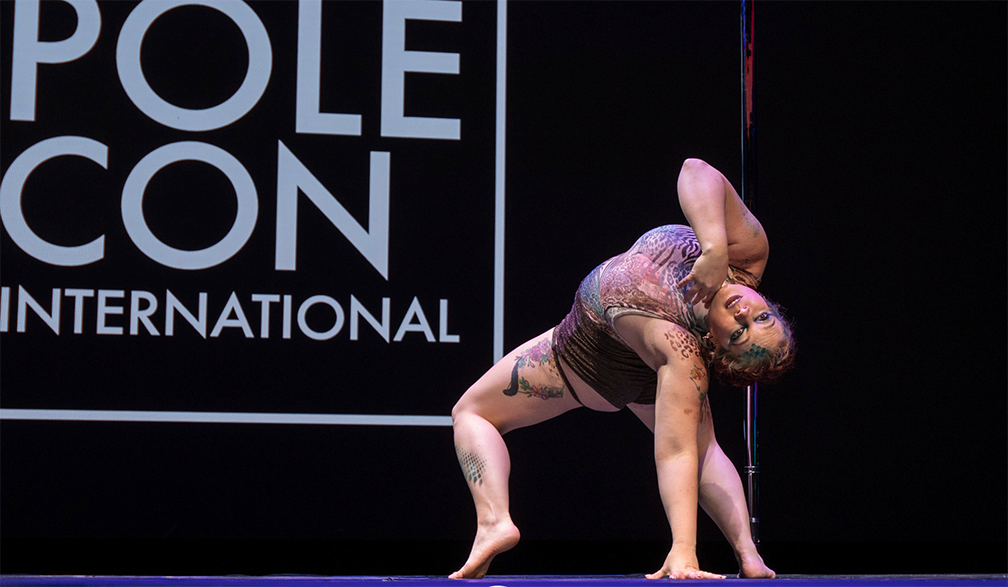
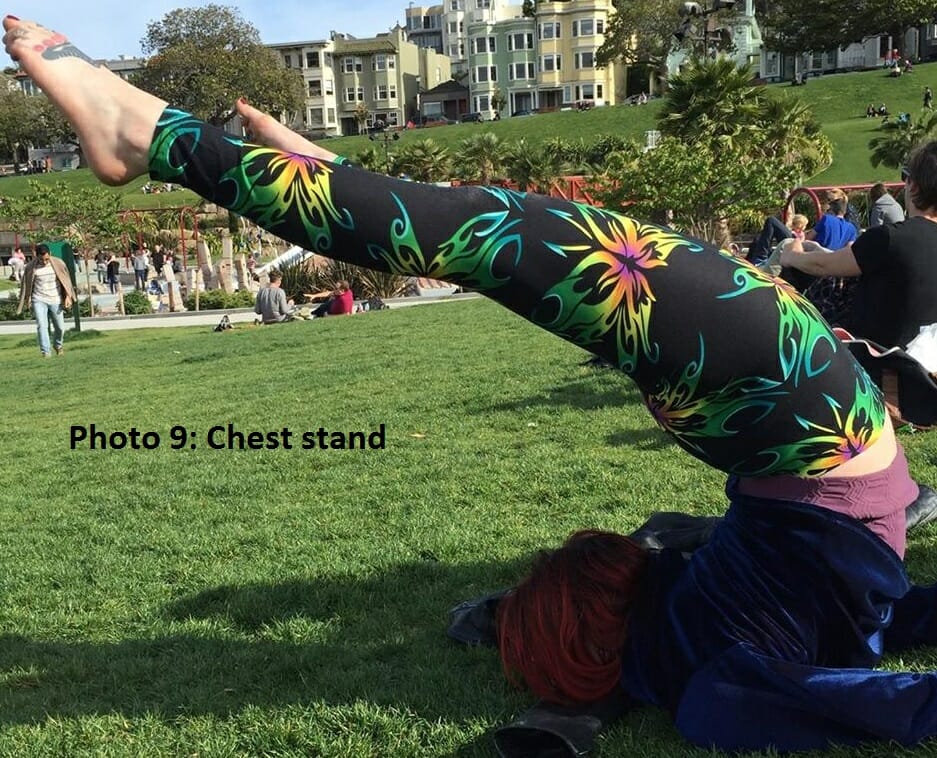
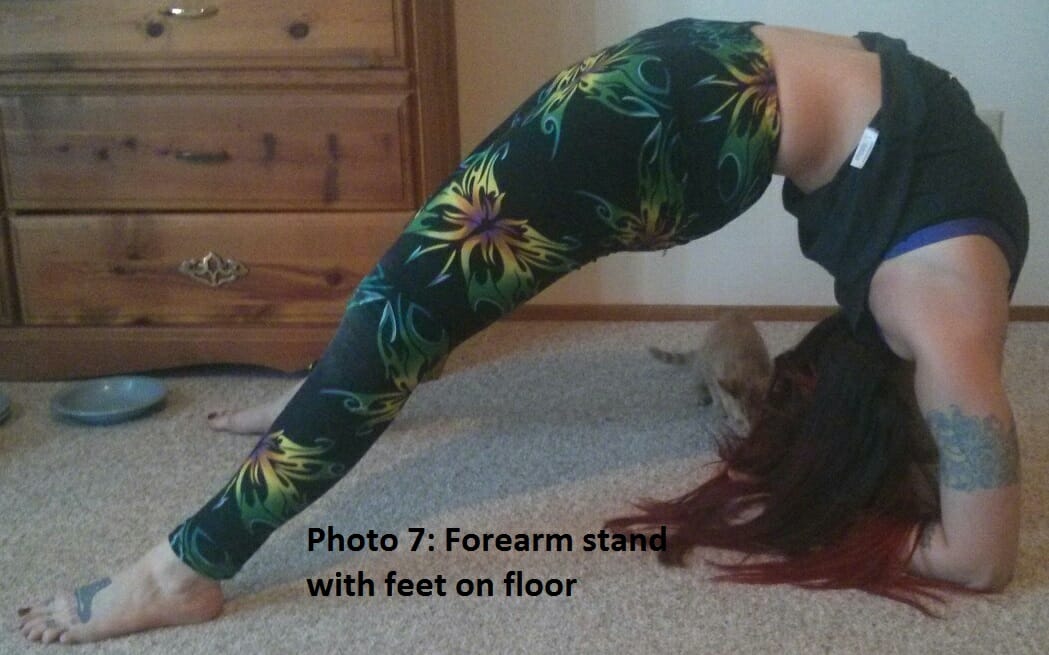
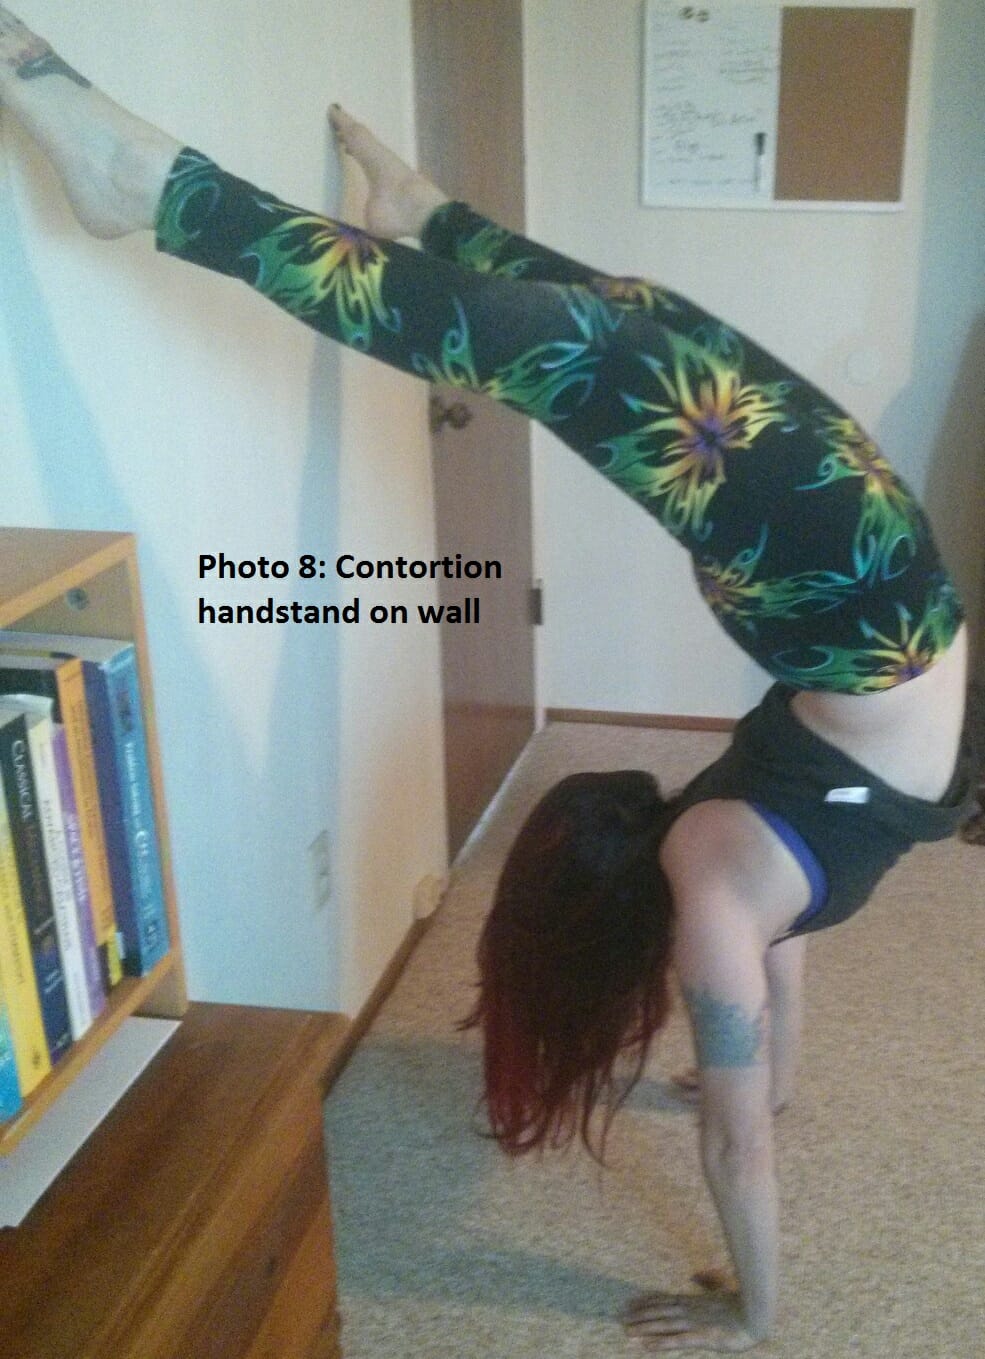
Finally, I get into my most advanced flexibility tricks such as contortion handstands, chest stands, etc. In any sort of “stand,” you can arch and fang your legs (feet towards your head) or keep your legs straight. Keep in mind that if you keep your legs straight, there will be more weight forcing your back to arch more. However, bent legs are easier to balance. Check out Photos 6-8 and the featured image.
I hope this aids you in your journey to beautiful back bending tricks! Please share any comments or questions with me.

Jody Ryker is a performer and instructor in the bay area specializing in acrobatic pole and aerial hoop. She teaches at Aerial Arts Santa Cruz four days per week. Jody also founded the acrobatic and aerial performance company Pole Diversity (www.polediversity.com). Jody is also working on a PhD in pure math at UCSC.
Latest posts by Jody Ryker (see all)
- Putting on Your First Pole Show: Part 1 - July 14, 2017
- Pole Inspiration - May 5, 2017
- Finding the Right Pole Teacher - March 3, 2017
Related Posts