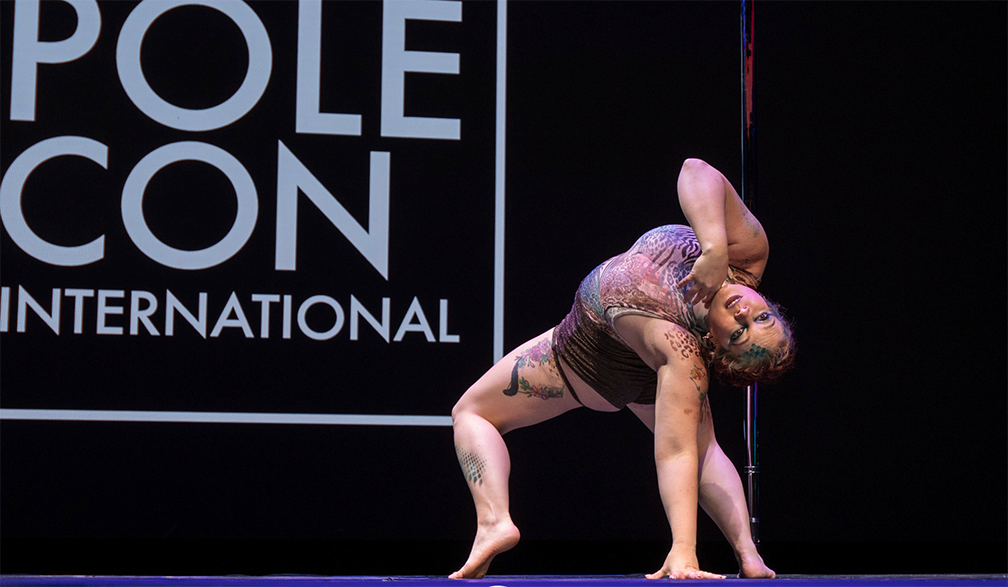
The year of our lord 2025 has really been a doozy. I’ve been feeling like…
Grip Changes Unlocked
Are you an advanced poler looking to take yourself to pro level? Do you feel solid in all of your Ayesha grips but want something more? It is time for you to master the magical grip change!
NOTE: Before working on any of the following exercises, make sure you are comfortable in your elbow and cup grip ayeshas. Also, be sure to practice safely with a mat down and a spotter around. Lastly, make sure that you have warmed up your body fully, focusing on shoulder stability.
Part 1: Check Your Technique
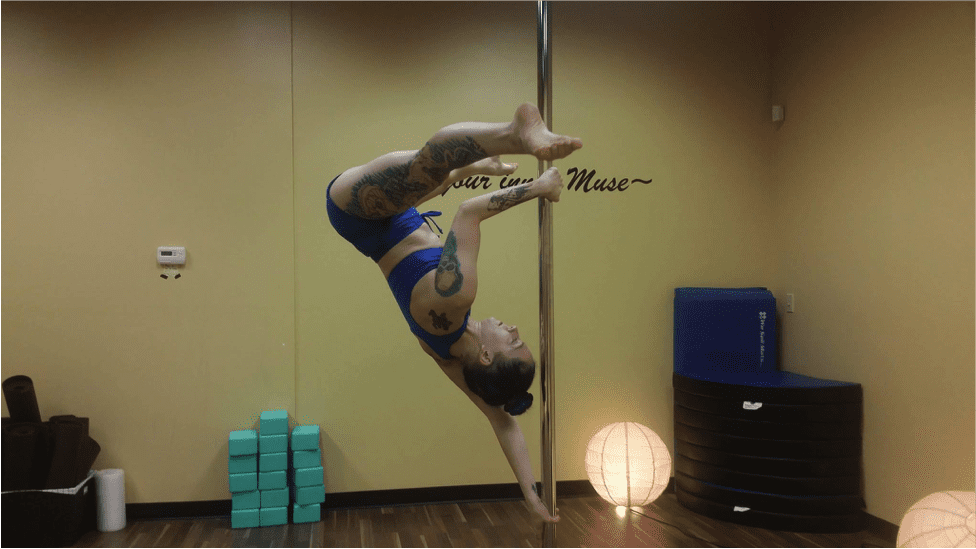
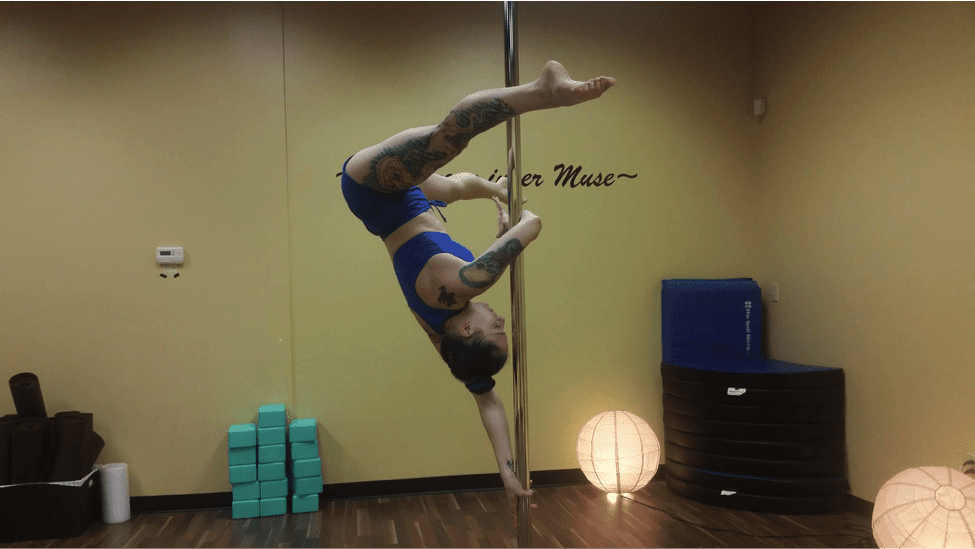
The first step to nailing a solid grip change is making sure that your Ayesha technique is strong, starting with elbow grip.
First, check your shoulder placement. When you are in the Ayesha, make sure that your shoulder is engaged and that your head is directly next to your arm. Secondly, check the alignment of your body. You’ll want to aim for a straight line from the wrist to the hips so that you are pushing down and in to the pole NOT pushing directly in front of you. *The same applies for cup grip Ayesha
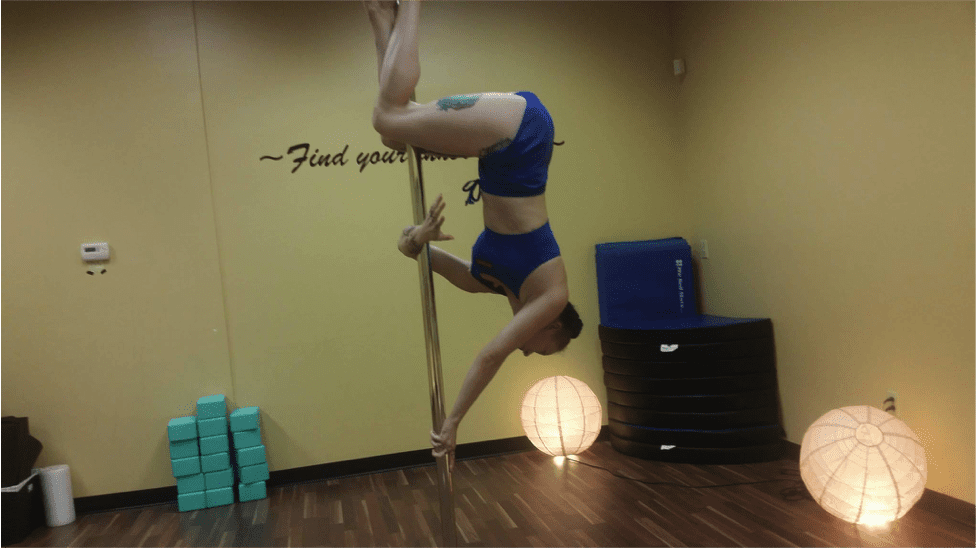
The next thing to get prepare is your hand to elbow orientation. A helpful tool to train your body to pop to the correct distance is to place your hand at an upward angle as opposed to down.
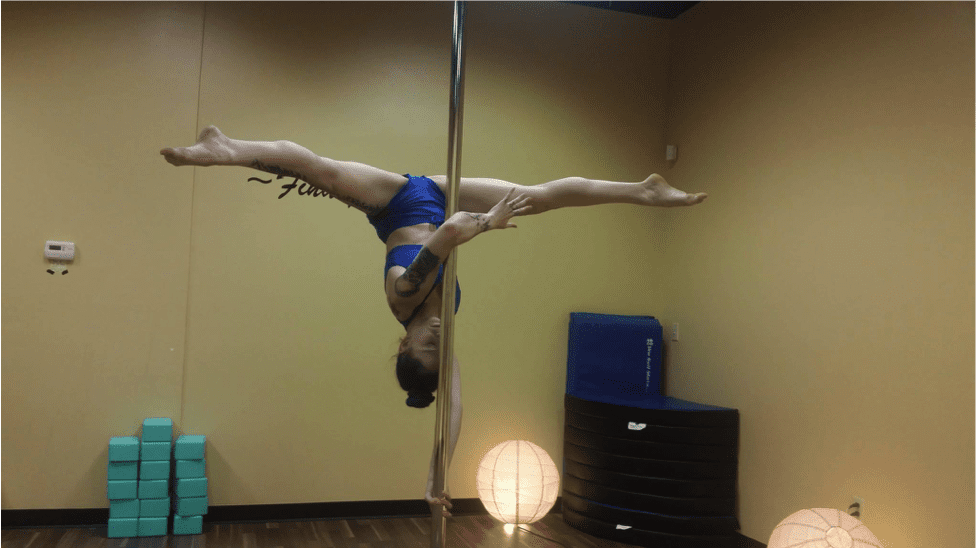
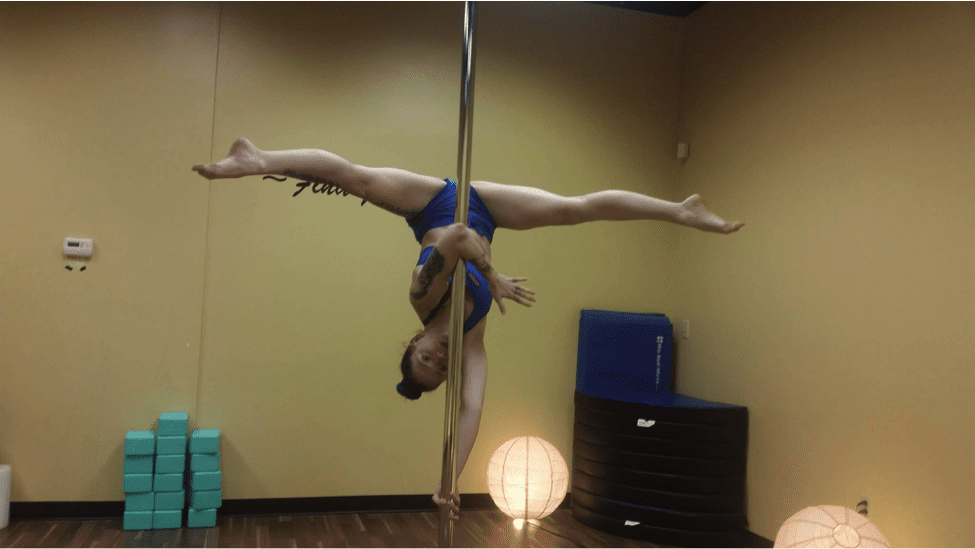
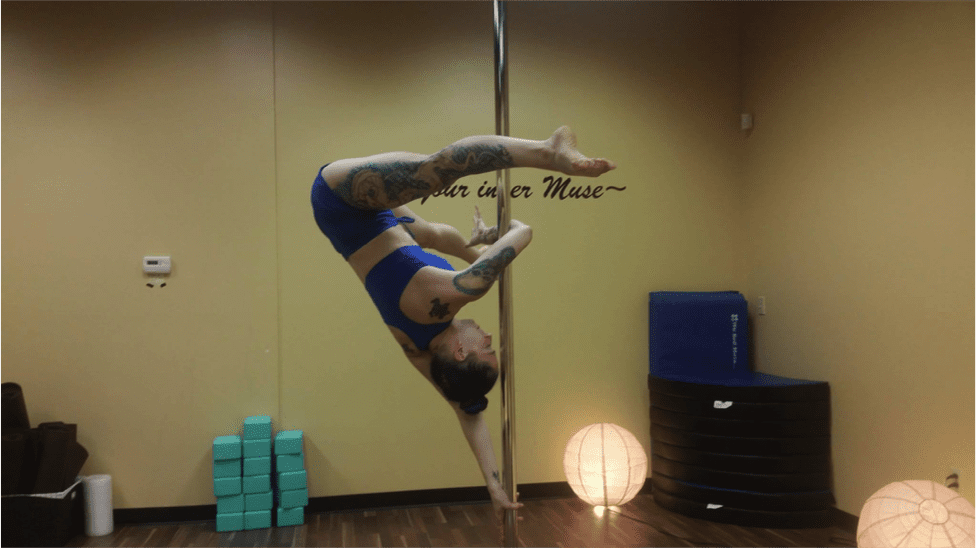
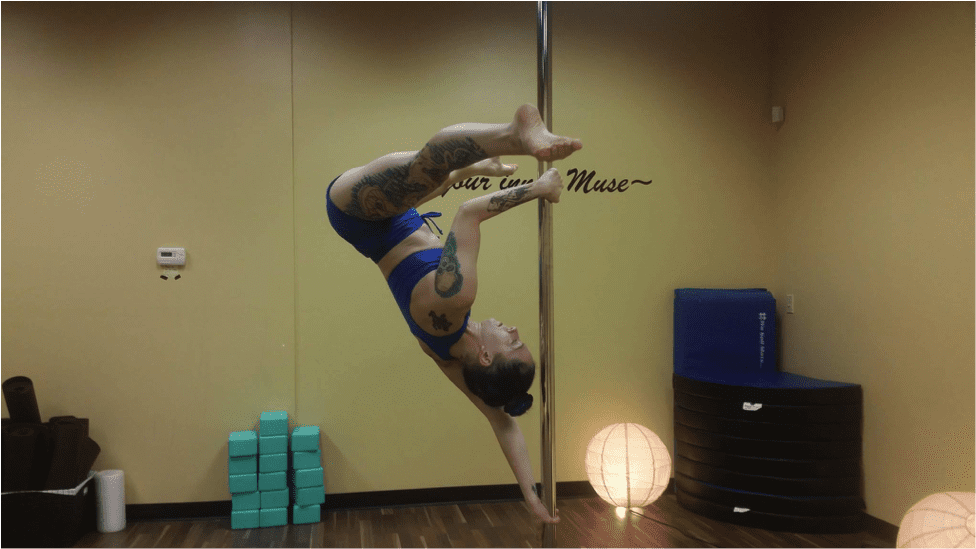
Now that you have mastered your elbow grip technique, it’s time to make sure that the landing pose (cup grip) is also in perfect form. Start by checking your shoulder placement again like you did with the elbow grip. Next, check your arm. In order to catch yourself safely and smoothly, you want to train your cup grip with a bent arm NOT a straight arm.
Part 2: Conditioning Exercises
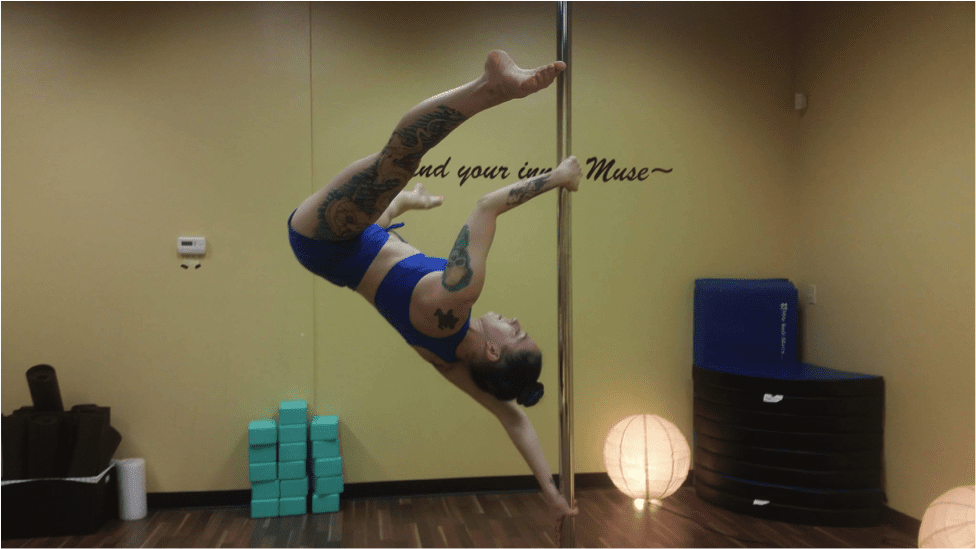
EXERCISE #1: To prep your elbow grip Ayesha for take-off, you’ll want to strengthen your shoulders in the pose to get a good push. To do this, lower in to your elbow grip Ayesha and do shoulder shrugs, pulling your shoulders to ears all while maintaining the rest of you Ayesha technique. It’s a subtle difference in the pictures but you will feel your shoulders gain the strength over time for the end push off.

EXERCISE #2: To prep your cup grip Ayesha for landing, you will want to strength the give and pull of your bicep. This will prevent you from slamming in to the pole or cartwheeling down. Lower in to your cup grip and pulse out and in with your arm. Make sure to keep your arm bent the whole time, never fully straighten it.
Part 3: Unlock the Grip Change
If you have mastered your ayeshas and spent a few weeks doing the conditioning exercises, then you are ready for the final step. Before you jump right on to the pole and start throwing your body around, make sure you lay a mat down and have a friend spot you.
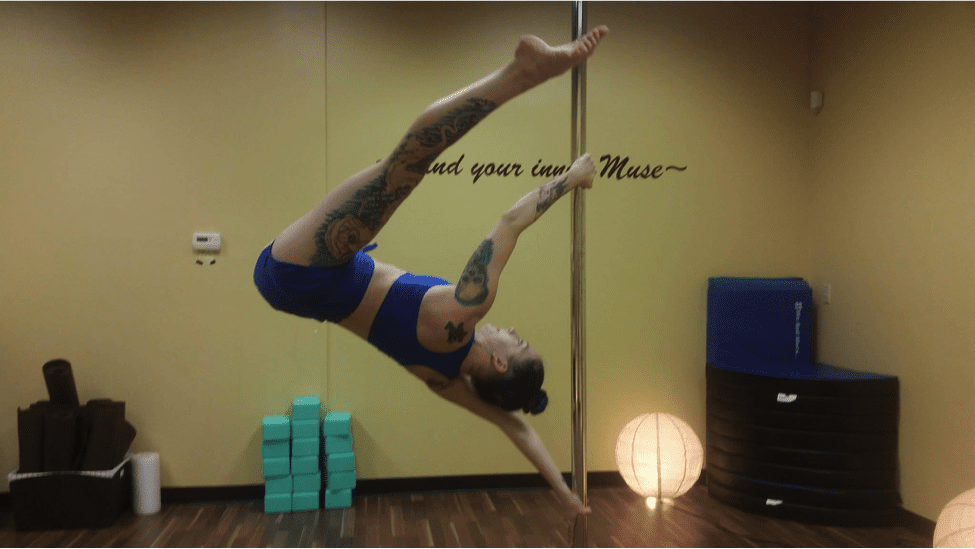
Start in the elbow grip Ayesha and pulse three times to prep yourself. Take a breath on the last pulse and slide or hop to your cup grip. You want to aim the cup grip above the point that you started your elbow grip (why we train the hand pointing up). If you pop to the same spot, you will sound like a rock hitting the pole, and it won’t have the effortless look. If you pop below your elbow, you risk the chance of your arm buckling and falling.
Keep practicing! Film yourself and critique. After a few tries and constant conditioning, you will be able to pop from grip to grip with your eyes closed (please don’t try to do that though!)

Leah Franklin has been a performer for as long as she can remember from doing musical theater growing up to graduating college with a degree in dance. She finally found her niche with pole dancing about two years ago. Leah has been competing for a year and showcasing for two (current titles include 3rd place at the Florida Pole Fitness Championship, 3rd place Dramatic level 4 division at the Central Pole Championships, and 2nd place Championship level 3 at US National Pole Championships). She is currently a student and instructor at Muse Pole Fitness in Columbia, Missouri.
Latest posts by Leah Franklin (see all)
- Progression to Repel Part 2 - June 22, 2018
- Progression to Repel Part 1 - May 4, 2018
- Ride or Die: My Pole Bestie - February 16, 2018
Related Posts